SuiteCRM is the world’s number 1 Open Source CRM system and Cronjobs/Workflows play a big part in why.
Workflows are automated processes that trigger on changes to something within the system. They can be triggered by a change of field status in a record or by something like a new record being added.
Cron is a Linux utility which schedules a command or script on your server to run automatically at a specified time and date. A cron job is the scheduled task itself. Cron jobs can be very useful to automate repetitive tasks. … Scripts executed as a cron job are typically used to modify files or databases.
So SuiteCRM Workflows can be triggered by a field or status being updated but what if you want to make a change or say send an email to a client that has not ordered anything for a period of time. This is where the scheduler and cron jobs come in handy.
A cron job can be scheduled to ping the system say every 2 minutes or just once per hour. On busy sites, I tend to run them every 2 minutes. I will cover cron jobs and scheduled Workflows in much more detail in a later lesson. For now, lets setup the cron jobs.
Cron jobs can be setup in your hosting CPanel but I find it much easier and more manageable to setup cron jobs through the ‘Easycron’ service which handles the scheduling for a very small fee. Believe me, it’s worth it.
For those of you who want to learn more about SuiteCRM scheduler and cron jobs, head over to the SuiteCRM website and look for ‘Scheduler Jobs in SuiteCRM in Linux – the Definitive Guide’
To setup cron jobs, you need to have access to an FTP client. I use Filezilla. You will need to make to small changes to the cron.php and config.php files in your SuiteCRM root directly. These are of course, services I can offer you if you are not confident of doing them yourself.
To make changes to a php file you will need to use a text editor like Notepad or an HTML editor. For simple changes like these, Notepad works just fine.
Just follow the simple steps below to configure cron jobs for your SuiteCRM.
Note:

Using the ‘All Files’ option in Notepad, first open cron.php and then change the following code from:
if (substr($sapi_type, 0, 3) != ‘cli’) {
sugar_die(“cron.php is CLI only.”);
}
to :
function easycron_get_ip_address() {
if (isset($_SERVER[‘HTTP_X_REAL_IP’]) && !empty($_SERVER[‘HTTP_X_REAL_IP’])) {
return $_SERVER[‘HTTP_X_REAL_IP’];
} else if (isset($_SERVER[‘HTTP_CLIENT_IP’]) && !empty($_SERVER[‘HTTP_CLIENT_IP’])) {
return $_SERVER[‘HTTP_CLIENT_IP’];
} else if (isset($_SERVER[‘HTTP_X_FORWARDED_FOR’]) && !empty($_SERVER[‘HTTP_X_FORWARDED_FOR’])) {
return $_SERVER[‘HTTP_X_FORWARDED_FOR’];
} else if (isset($_SERVER[‘REMOTE_ADDR’]) && !empty($_SERVER[‘REMOTE_ADDR’])) {
return $_SERVER[‘REMOTE_ADDR’];
} else {
return ”;
}
}
$easycron_ip = easycron_get_ip_address();
$easycron_ip_is_from_easycron = false;
if (!empty($easycron_ip)) {
$easycron_bot_ips_in_json = file_get_contents(‘https://www.easycron.com/ips.json’);
$easycron_bot_ips = json_decode($easycron_bot_ips_in_json, true);
if (filter_var($easycron_ip, FILTER_VALIDATE_IP, FILTER_FLAG_IPV4)) {
if (in_array($easycron_ip, $easycron_bot_ips[‘ipv4’])) {
$easycron_ip_is_from_easycron = true;
}
} else if (filter_var($easycron_ip, FILTER_VALIDATE_IP, FILTER_FLAG_IPV6)) {
if (in_array($easycron_ip, $easycron_bot_ips[‘ipv6’])) {
$easycron_ip_is_from_easycron = true;
}
}
}
if (!$easycron_ip_is_from_easycron) {
if (substr($sapi_type, 0, 3) != ‘cli’) {
sugar_die(“cron.php is CLI only.”);
}
}
Then save.
I always rename original files that I have edited so before reuploading, rename cron.php in your SuiteCRM folder to old_cron.php
Now upload the edited file.
The true significance of what you are doing now will become clear as you run through my lessons and as your experience with SuiteCRM grows.
Now let’s make the changes to the config.php file as per the instructions on the Easycron support page.
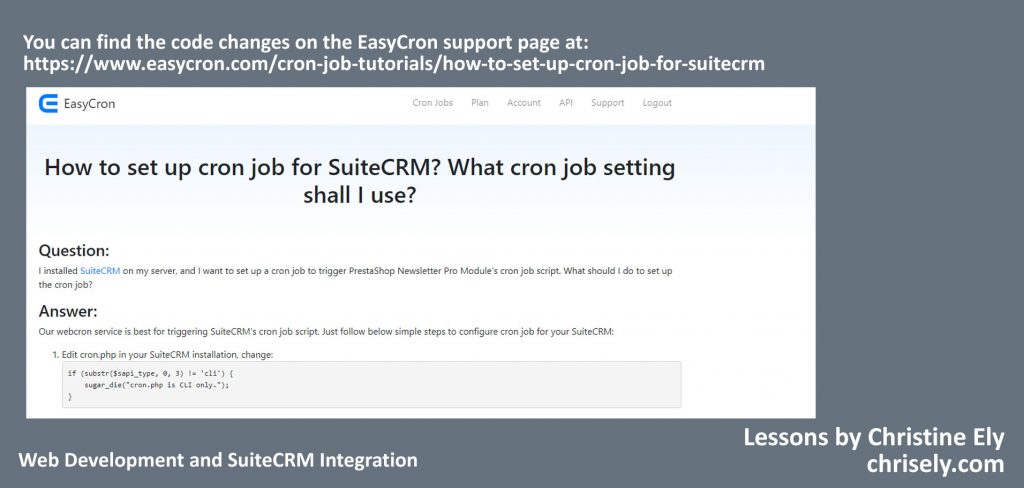
Access the Easycron support page (from here)
Run through the same process as you did with the cron.php code following the instructions in the Easycron guide. You will be adding your FTP username to the config.php file.
Rename the old file in the SuiteCRM root and upload your edited file.
Now update your Easycron dashboard with your credentials:
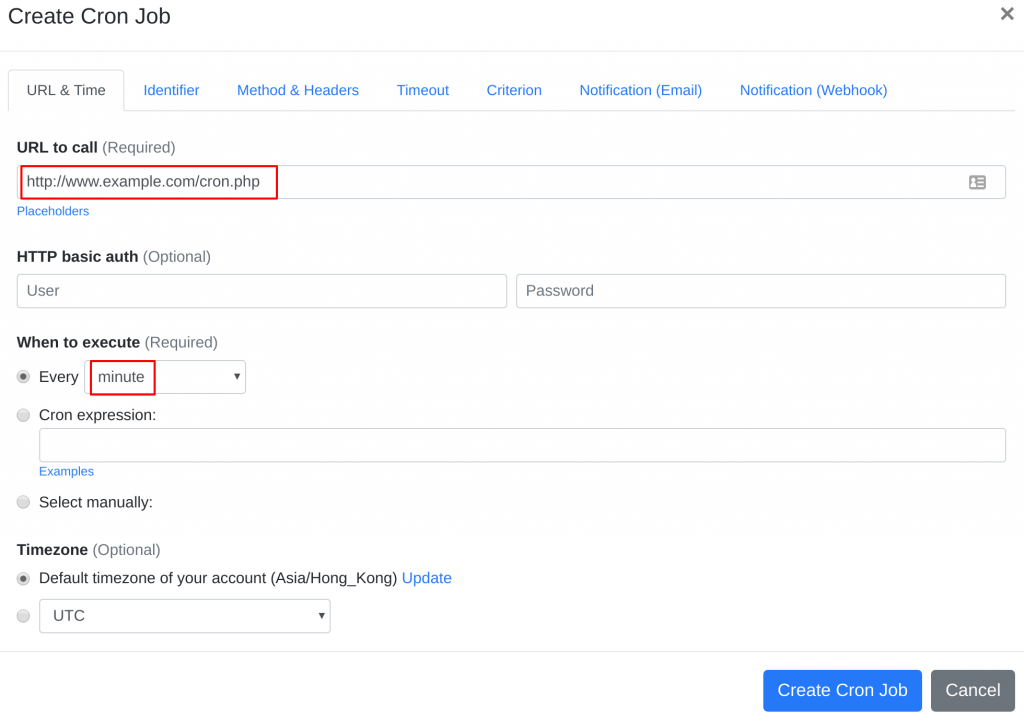
Open your cron job dashboard, click on ” Cron Job” button and enter the relevant details for your installation.
In field “URL to call”, enter http://www.example.com/cron.php (set cron job to run every minute)
(replace www.example.com with your install location). Checkout below screenshot:

Your suiteCRM cron job should now be able to get triggered successfully from EasyCron.
